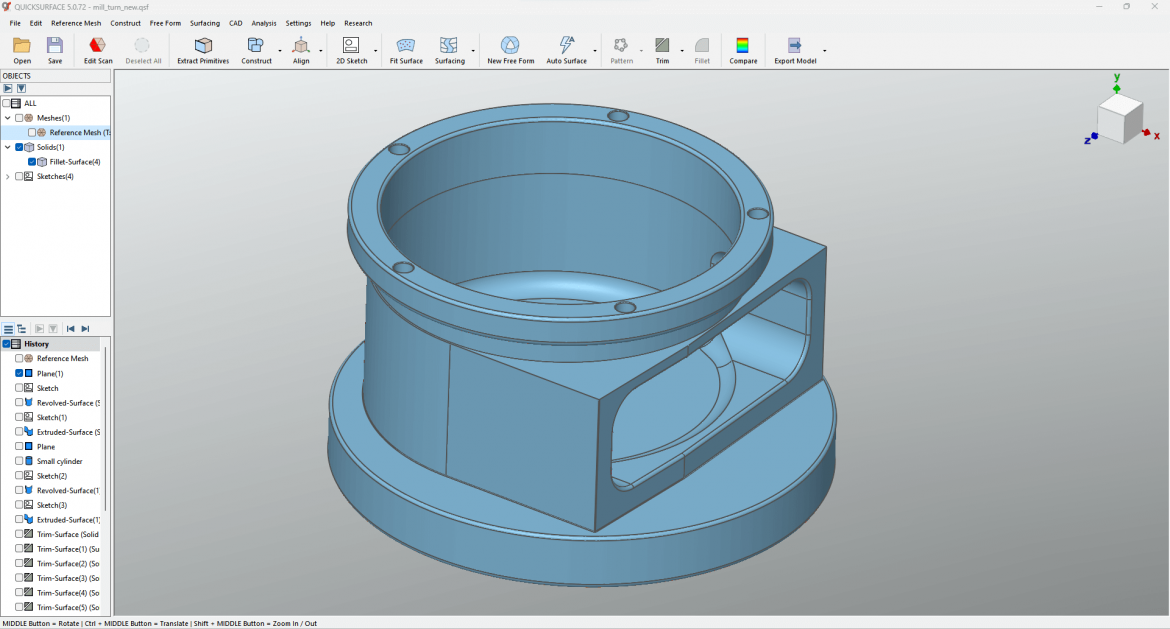
The main goal of reverse engineering is to turn a raw 3D scan (a high-density mesh file) into a CAD (Computer-Aided Design) model that can be used and made. This change, which is often called “Scan-to-CAD,” needs special scan-to-CAD software that was made just for this purpose, to connect static mesh data with live, editable, mathematical features. QUICKSURFACE (a key part of the 3DeVOK digital solution) and other top platforms give you the tools you need to make this change, making sure that the final product is correct, accurate, and ready for production. This workflow doesn’t happen all at once; it’s a careful process that is broken down into four important steps.
Get the data and improve the mesh
The quality of the original data is what makes a Scan-to-CAD conversion work. Data Acquisition is the first step in the process. This is where a high-precision 3D scanner, like the ones made by 3DeVOK, captures the object’s physical shape. This makes a huge point cloud that is usually turned into a standard file format like STL, OBJ, or PLY. This mesh is a dense network of polygons that accurately shows the object’s surface. However, it is not editable like a CAD file is.
The next important step is Mesh Optimization, which is done in the scan to CAD software. There is always noise, sensor artifacts, or holes in raw scan data. You can use the software’s tools to clean up and get this data ready for modeling. Some important steps are getting rid of outliers, filling in gaps to make a watertight model, and smoothing out noise on the surface without losing important geometric detail. If the object was scanned from different angles, the software’s registration tools are used to perfectly line up and stitch these separate scans together to make a single, high-quality mesh. This optimized mesh is now the very accurate digital reference template for all future reconstruction work.
Make and align the reference geometry
Before reconstruction can start, the mesh needs to be in the right place, and its basic geometric features need to be taken out. The engineer uses the 3D reverse engineering software to get rid of geometric primitives. You do this by choosing areas of the mesh that match simple, mathematically defined shapes like perfect planes, true cylinders, or spheres. Then, the software automatically fits the best mathematical primitive to the chosen scan data points, making up for any flaws in the physical object.
These new primitives, which are now live mathematical objects instead of static mesh data, are then used to align objects. The software accurately aligns the entire scan mesh to the world coordinate system, which is defined by the X, Y, and Z axes, by using three primitives that are all perpendicular to each other. This alignment is very important because it sets the manufacturing datums and makes sure that the final CAD model is in the right position and has the right orientation for quality control checks, assembly analysis, and CNC machining. The final model would not be useful for engineering purposes without the precise alignment that the scan to CAD software makes possible.
Rebuilding the Model with Parameters and Free Form
Rebuilding the editable CAD geometry is the most important part of the conversion process. This is done with a powerful Hybrid Modeling approach in the 3D reverse engineering software. This method knows that real-world parts usually have both mechanically accurate dimensions and complex, organic free-form surfaces.
The software lets users make Parametric Sketches by taking cross-sections through the mesh for mechanical features. The mesh geometry is put on these planes, which the engineer then uses as a guide to draw constrained, dimensionally accurate 2D profiles. Then, these sketches are extruded, revolved, or swept to make solid 3D shapes. All of these shapes have editable parameters, just like in regular CAD. The scan to CAD software has Free-Form Surface Creation tools, like the Quad Surface feature in QUICKSURFACE, that can be used to make surfaces that are complex, beautiful, or natural. This feature makes a smooth network of NURBS (Non-Uniform Rational B-Splines) surfaces that fit perfectly with the high-density curves of the mesh below. This hybrid feature makes sure that the final CAD model is a perfect mix of features that are both mathematically accurate and easy to understand geometrically.
Confirming, setting parameters, and exporting for good
The last step checks that the reconstruction is correct and gets the model ready to be used in manufacturing. The Real-Time Deviation Analyzer that comes with the 3D reverse engineering software checks for accuracy. This tool makes a map right away that shows the exact distance, or deviation, between the new CAD surfaces and the original reference scan mesh. The map is color-coded. This ongoing metrology check makes sure that the final model meets all of the dimensional tolerances that were set.
The finished model is a fully parametric CAD file, which means that you can change its features, dimensions, and limitations. Lastly, the finished model is saved in Universal CAD Formats like IGES or STEP. This important step makes sure that the correct, professional model made with the 3DeVOK workflow can be easily imported and used by any major CAD, CAM, or inspection software around the world. This completes the process of turning a physical object into a digital asset that is ready for production.
